Getting Started
Learning targets
- Start mesh generator
JCMgeofromJCMcontrol(here) - Start
JCMgeofrom the command line (console) (here) - Start
JCMgeowithin Matlab (here) - Start
JCMgeowithin Python (here) - Display the generated geometrical mesh using
JCMview
To start with the tutorial, please unzip the archive GeoTutorial.zip. All the example files are contained within the archive in sub-folder corresponding the chapters/sections of the document.
The geometry of the “Hello World” example is a single circle in 2D. The file layout.jcm has the following simple structure:
Layout2D {
  Objects {
    Circle {
      Name = "MyFirstCircle"
      Radius = 1
      RefineAll = 2
    }
  }
}
We postpone the discussion of the input structure in layout.jcm to the subsequent sections. First, we demonstrate how to run JCMgeo.
JCMgeo in JCMcontrol
Open the file layout.jcm’ (placed in sub-folder `GeoTutorial/GettingStarted) within JCMcontrol by using Open from the File menu (Open Project will not work for pure meshing projects). JCMcontrol will prompt you when opening the layout.jcm file and asks, if it is to be loaded as a meshing project. The meshing project will appear in the project explorer as shown in the following figure:
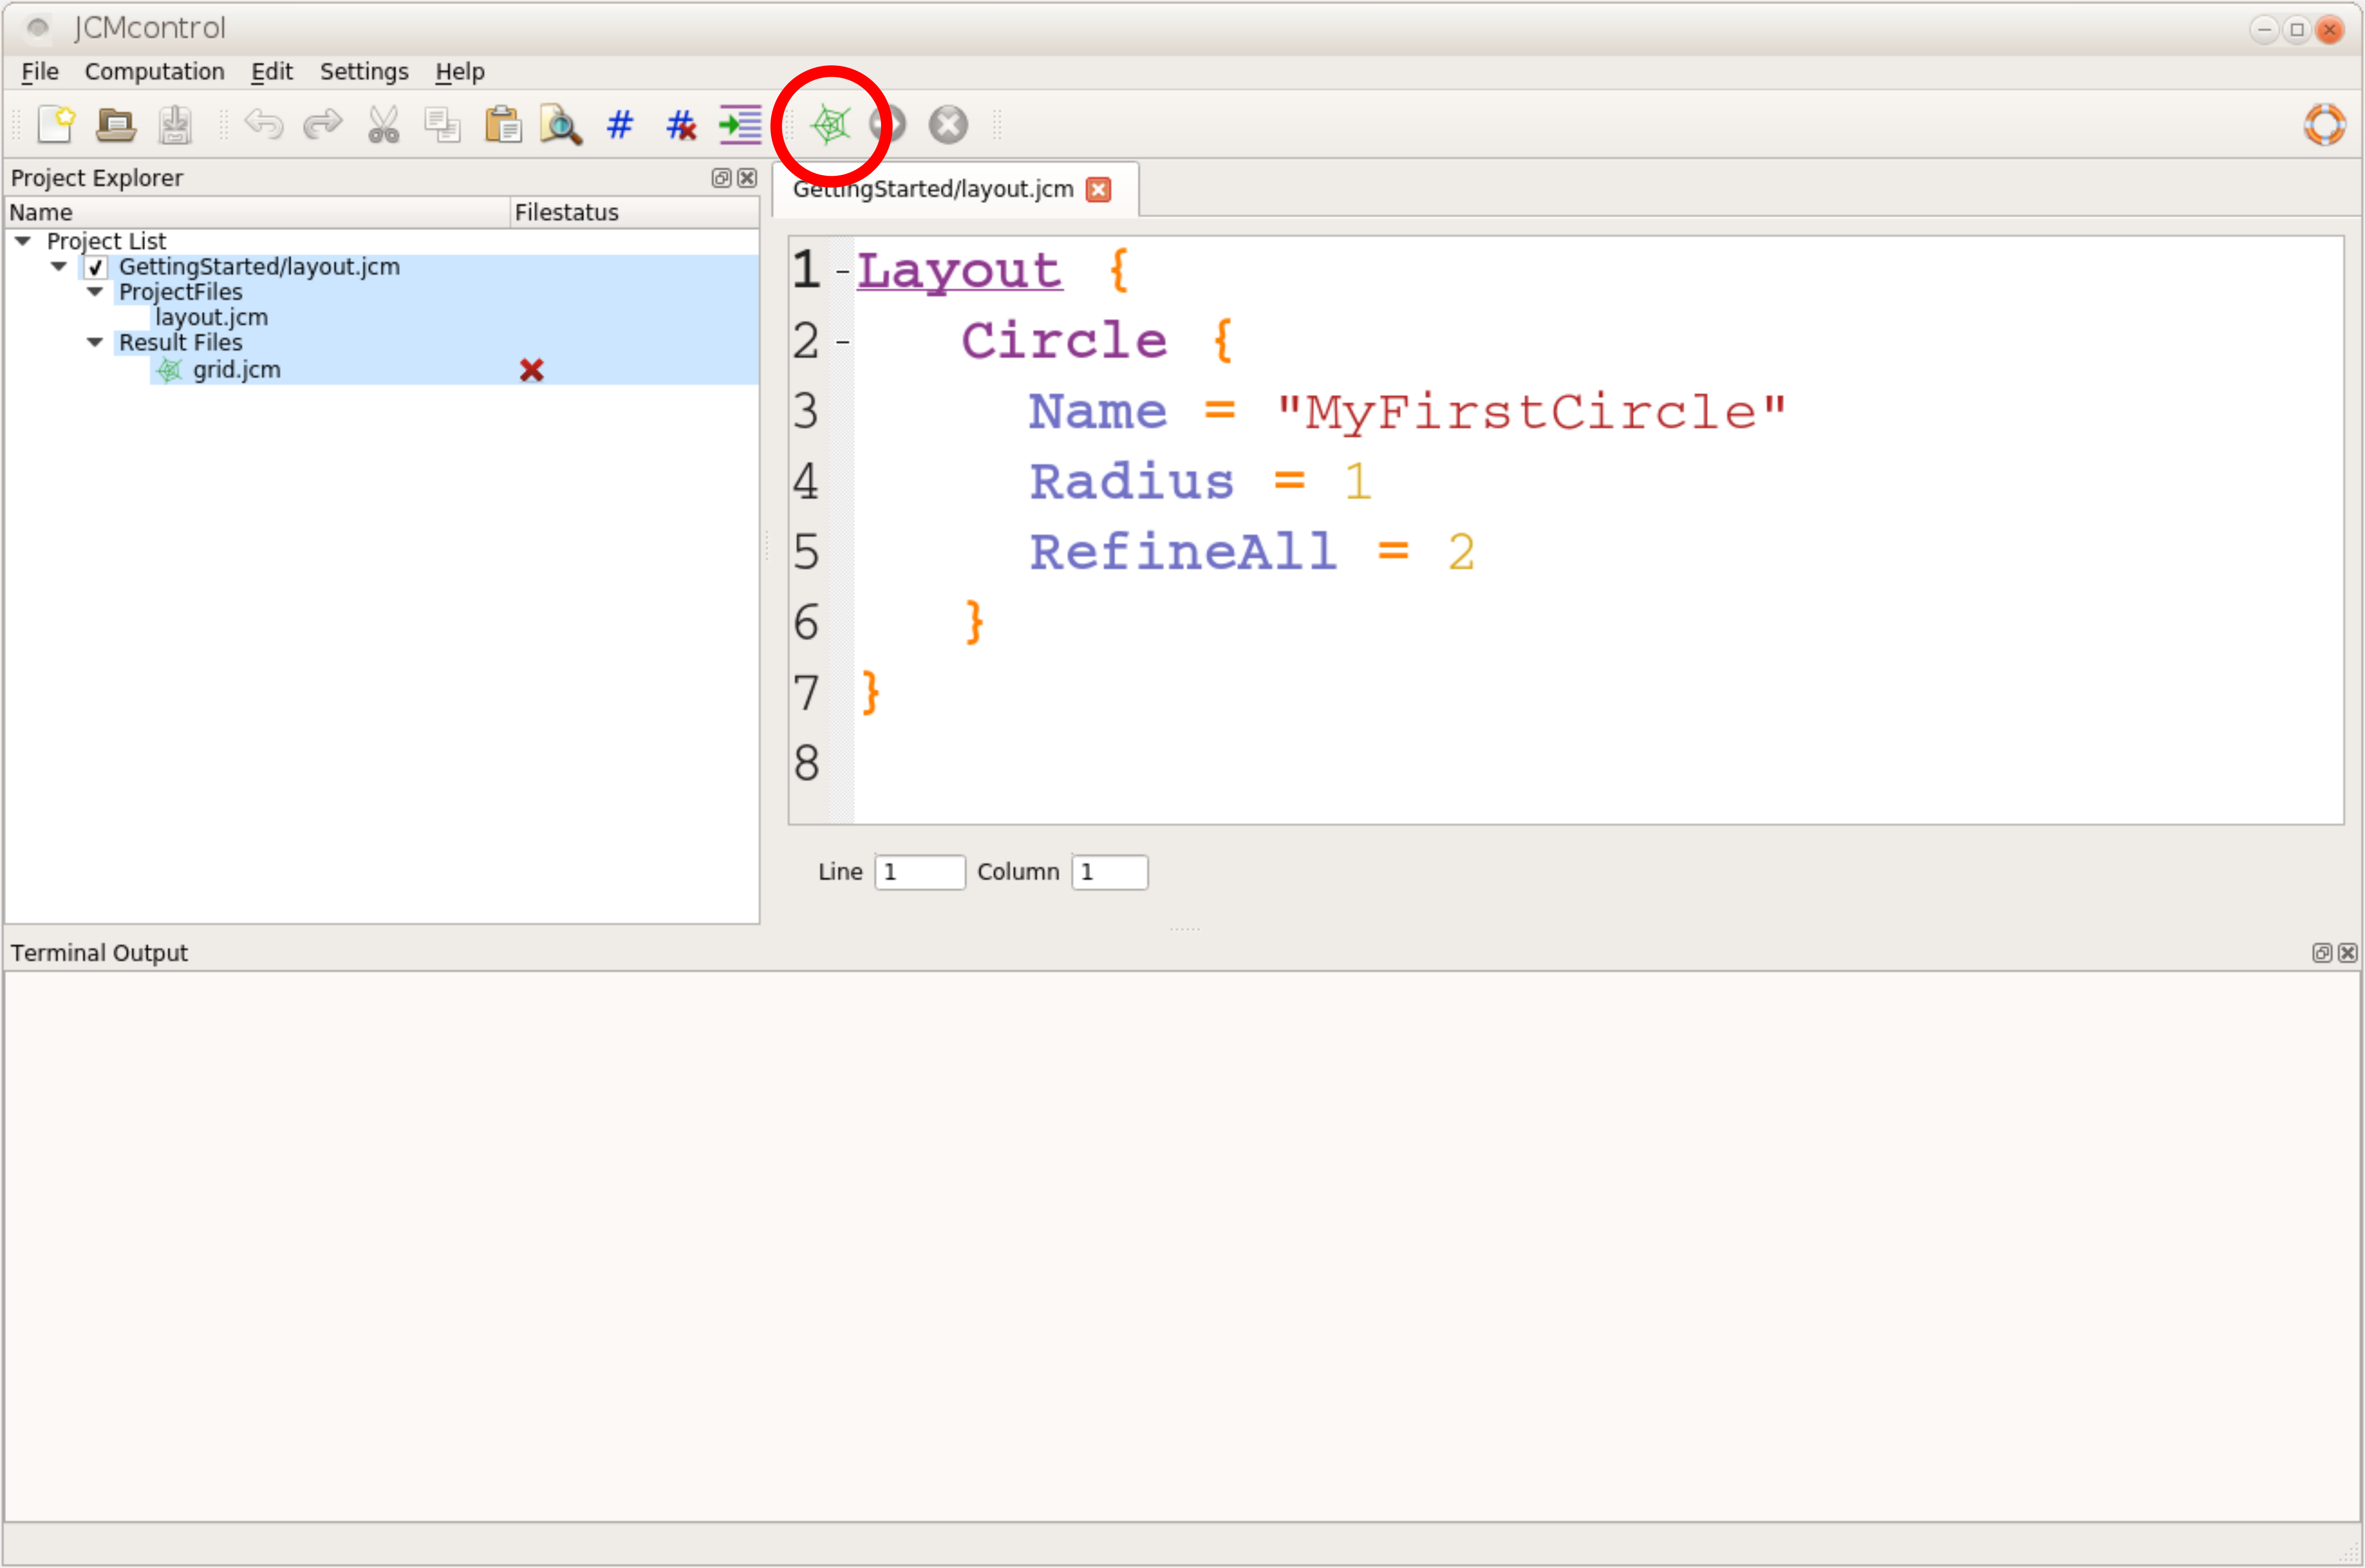
GettingStarted/layout.jcm opened JCMcontrol
The file layout.jcm appears as a project file and can be opened for editing by double-clicking. To run the mesh generation use the button marked with a red ellipse in the snapshot above. This will create the mesh file grid.jcm placed in the same directory. JCMcontrol lists this file in the Result Files section (see snapshot above). By double-clicking the mesh is shown within JCMview:
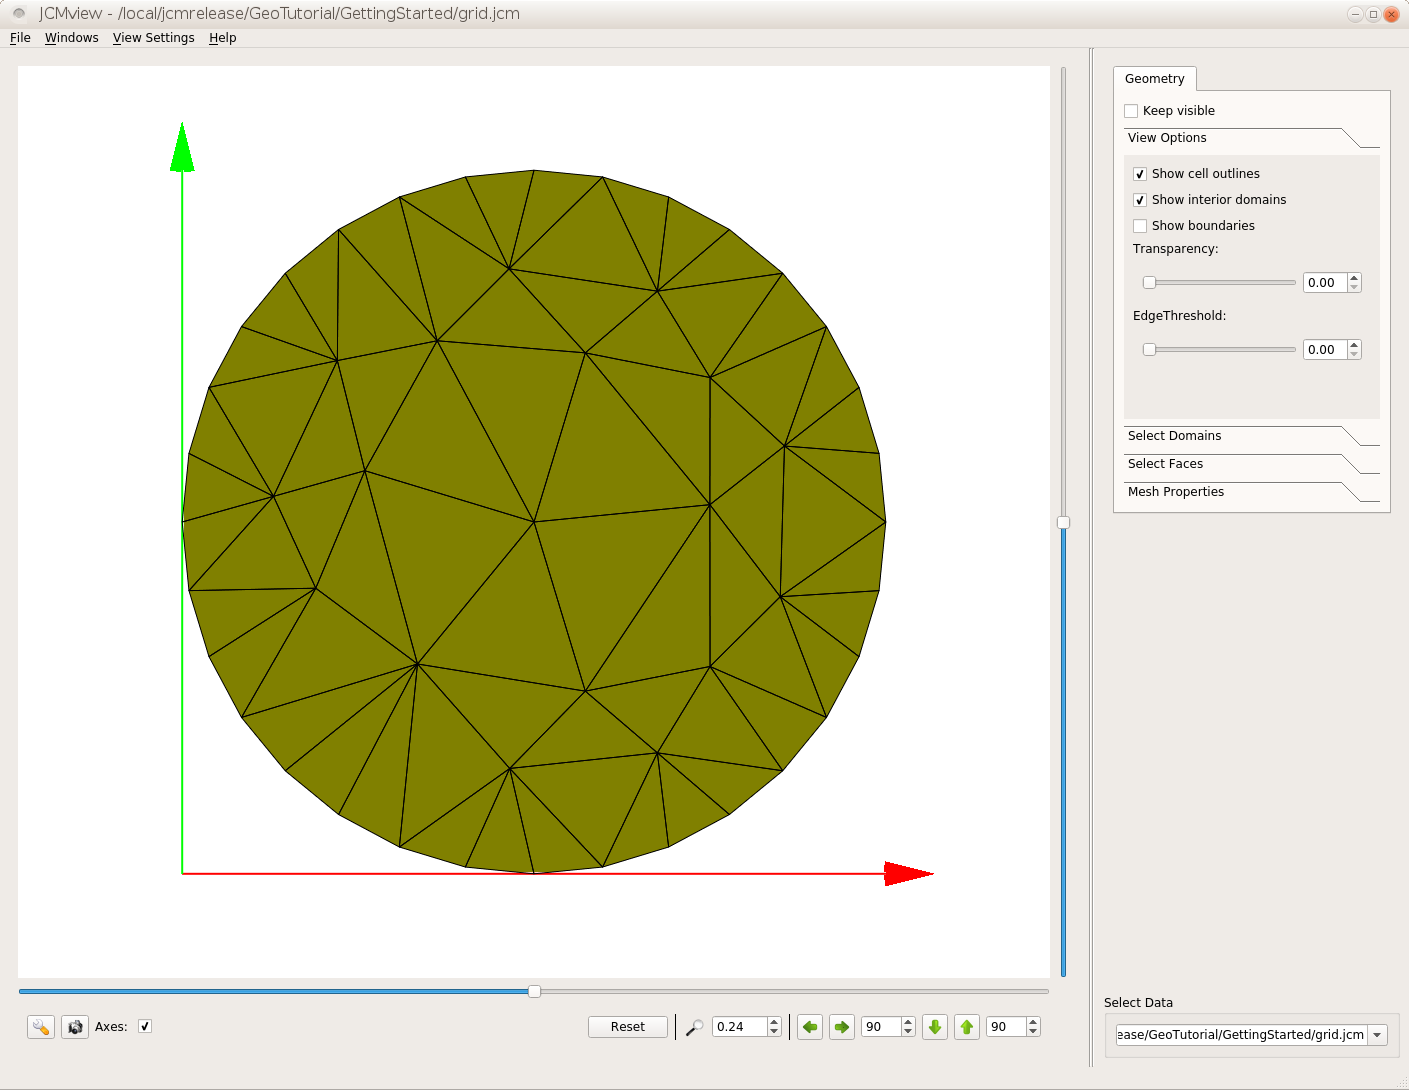
Generated mesh shown in JCMview
JCMgeo in the command line
You can start JCMgeo from the user interface JCMcontrol or via the command line (console):
>> JCMgeo <ProjectDir>
The mesh generator JCMgeo processes the input file layout.jcm to generate a finite element mesh file grid.jcm also placed in the project directory. Use JCMview to show the generated mesh:
>> JCMview <ProjectDir>/grid.jcm
You can combine both steps by using the optional argument --show:
>> JCMgeo <ProjectDir> --show
With the following command,
>> JCMgeo <ProjectDir> --show <secs>
the graphic window will automatically close after <secs> seconds.
JCMgeo in Matlab
The tutorial Matlab® Interface introduces the usage of JCMsuite within Matlab in great detail. Here we want to summarize the matlab calls wrapping the above calls of JCMgeo in the console:
jcmwave_geo(<ProjectDir>); % creates mesh file <ProjectDir>/grid.jcm from layout <ProjectDir>/layout.jcm
jcmwave_view(fullfile(<ProjectDir>, 'grid.jcm')); % shows created mesh
jcmwave_geo(<ProjectDir>, [], 'show', inf); % automatically shows mesh after creation
jcmwave_geo(<ProjectDir>, [], 'show', 3); % automatically shows mesh after creation,
                                          % graphic windows closes automatically after 3 secs
JCMgeo in Python
The tutorial Python Interface introduces the usage of JCMsuite within Python is great details. Here we want to summarize the python calls wrapping the above calls of JCMgeo in the console:
jcmwave.geo('<ProjectDir>') # creates mesh file <ProjectDir>/grid.jcm from layout <ProjectDir>/layout.jcm
jcmwave.view(os.path.join('<ProjectDir>', 'grid.jcm')) # shows created mesh
jcmwave.geo('<ProjectDir>', show=float('inf')) # automatically shows mesh after creation
jcmwave.geo('<ProjectDir>',show=3) # automatically shows mesh after creation,
                                 # graphic windows closes automatically after 3 secs